“How do I automate lead importing from Gmail to a spreadsheet?”
– Disgruntled salesperson
“How do I parse and extract data from Gmail to Google Sheets?”
“How do I convert an email to a spreadsheet?”
It’s no secret that Gmail management is demanding work. As marketers, we have to stay on top of everything from analytics to customer support and email campaigns. It’s tough to juggle work when you’re also responsible for handling almost all the work, especially on the technical side.
You’re switching between your Gmail and other tools like a headless chicken. In this article, I’ll show a simple hack on how to automate this nightmarish task. No code and scripts are required!
Who Benefits from this Automation?
I see two groups that might benefit from the automation to export Gmail to Google Sheets. Both teams require time to constantly update email messages.
a) Business Development and Sales teams: A salesperson who is involved in Lead Generation saves time when leads are automatically sent to a spreadsheet and does lead matching.
b) Email Outreach teams: An email outreach person benefits from this automation when an email campaign, especially bulk ones, has a high response rate.
Requirements
a) A Google Workspace or a GSuite subscription. The email to retrieve data from should be a company email like [email protected]. A personal Gmail account like [email protected] has extra steps that are beyond this article. I like to keep this tutorial simple and easy to follow.
b) A Make account.
What is Make?
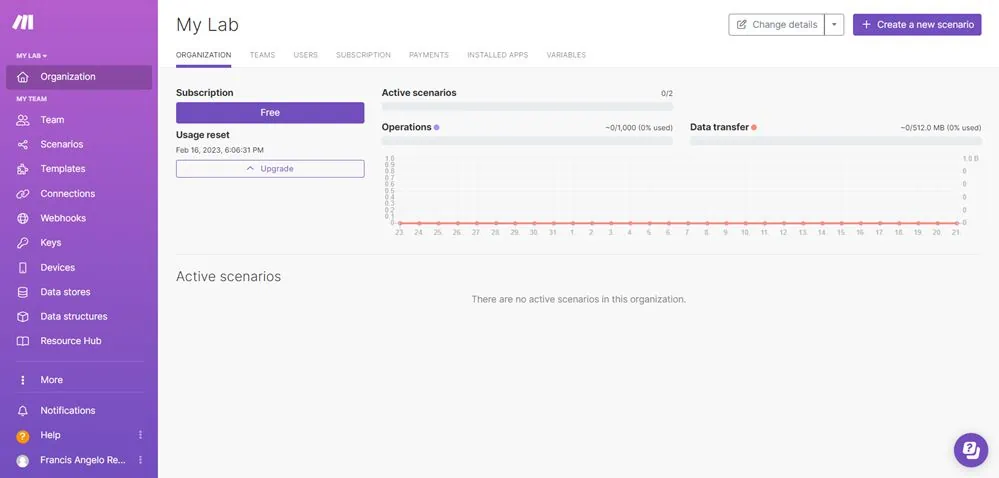
Make is a powerful integration platform that allows you to visualize, design, and automate your work in minutes. In other words, it lets apps talk to each other so that you can remove repetitive tasks.
Make supports a multitude of integrations and apps across the board. From email to spreadsheets to forms to to-do lists. Automate any part of your marketing operation one way or another. You’re like Iron Man with different technologies in the palm of your hand.
Create a Make account and get started.
How to Connect and Export Gmail to Google Sheets
Setting Up Gmail Connection
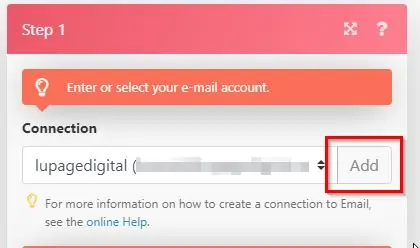
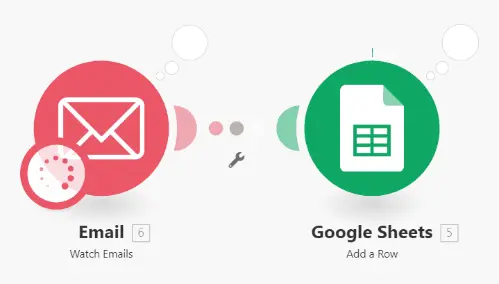
First is setting up the Gmail connection under the Email module.
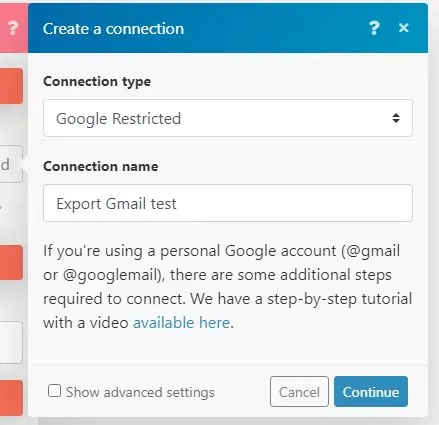
2 – Under Connection type, select Google Restricted.
Important Note: Using a personal @gmail.com address has extra steps. This article assumes that you’re using a professional email like [email protected]. Otherwise, you need to connect using custom authentication.
3 – Under Connection name, name the connection. The name is arbitrary so it’s up to you. But I suggest writing a descriptive name for later use.
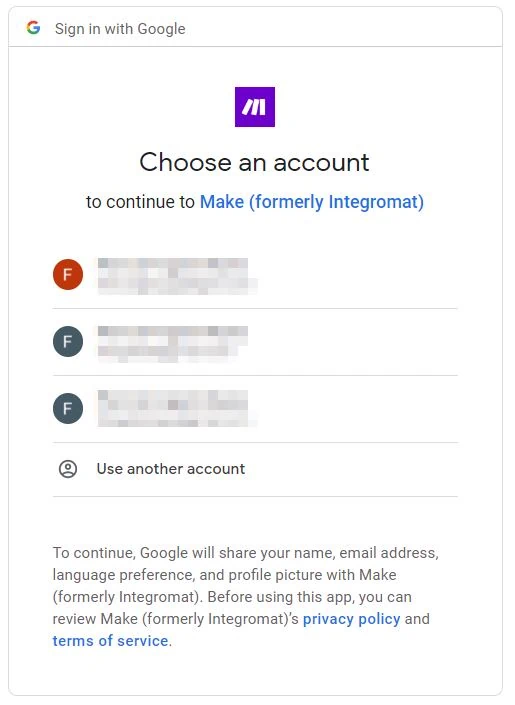
4 – Click on Continue. A pop-up window appears.
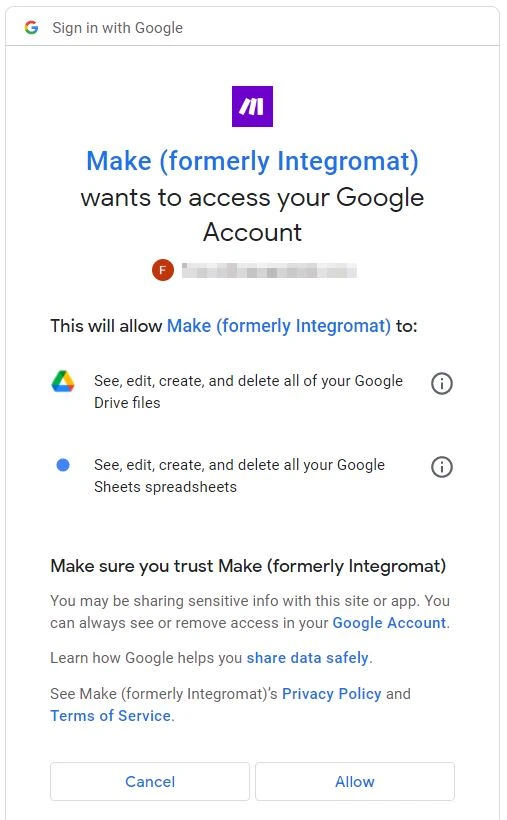
6 – Click on Allow. Integromat asks permission to access your Google account. This is standard procedure. The window closes after clicking it.
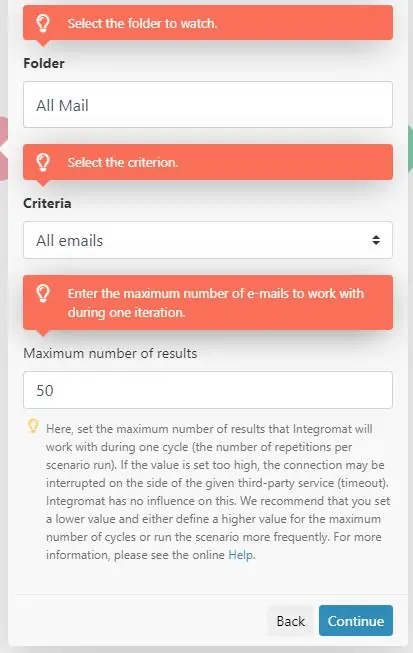
7 – Back in Integromat, under Folder is where you select the folder from Gmail that you want to connect. Start with All Mail as an example. This changes depending on your specific cases.
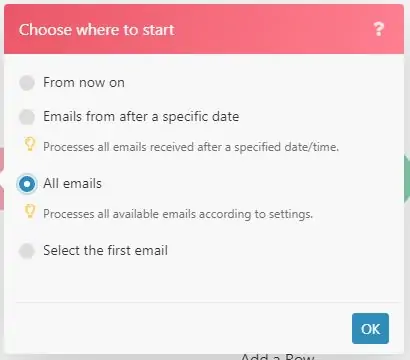
8 – Under Criteria, select if you want to retrieve All emails, Only Read emails, and Only Unread emails. Select All emails as an example.
9 – Under Maximum number of results, select the number of emails you want to retrieve. Select 50 as an example.
10- Click on Continue.
Done! At this point, you’re finished with the email connection side.
Setting Up Google Sheets Connection
Next is setting up the Google Sheets connection. But first, you need to go to Google Drive and create a new Google Sheets file.
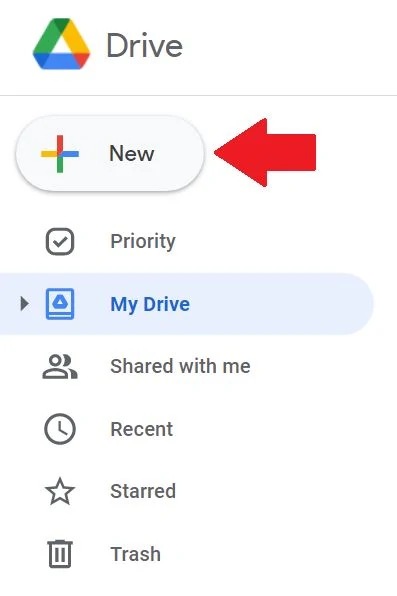
1 – Go to your Google Drive workspace.
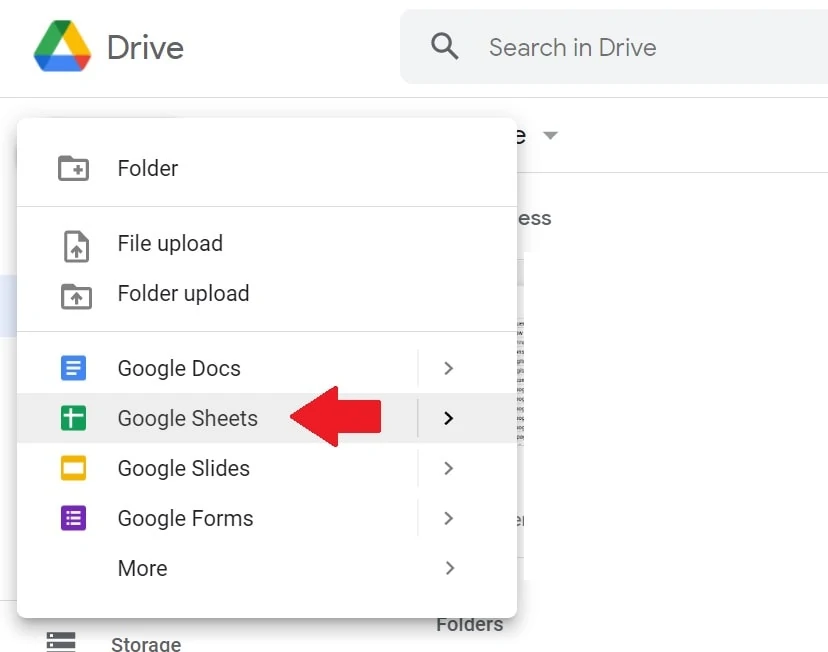
2 – Click on + New then create a new Google Sheets file.
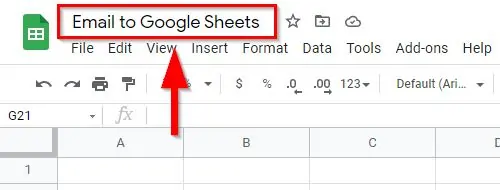
3 – Name the Google Sheets file. The name is arbitrary so it’s up to you. But I suggest writing a descriptive name for later use.
4 – Name the tab or sheet on the bottom. The name is arbitrary so it’s up to you. But I suggest writing a descriptive name for later use.
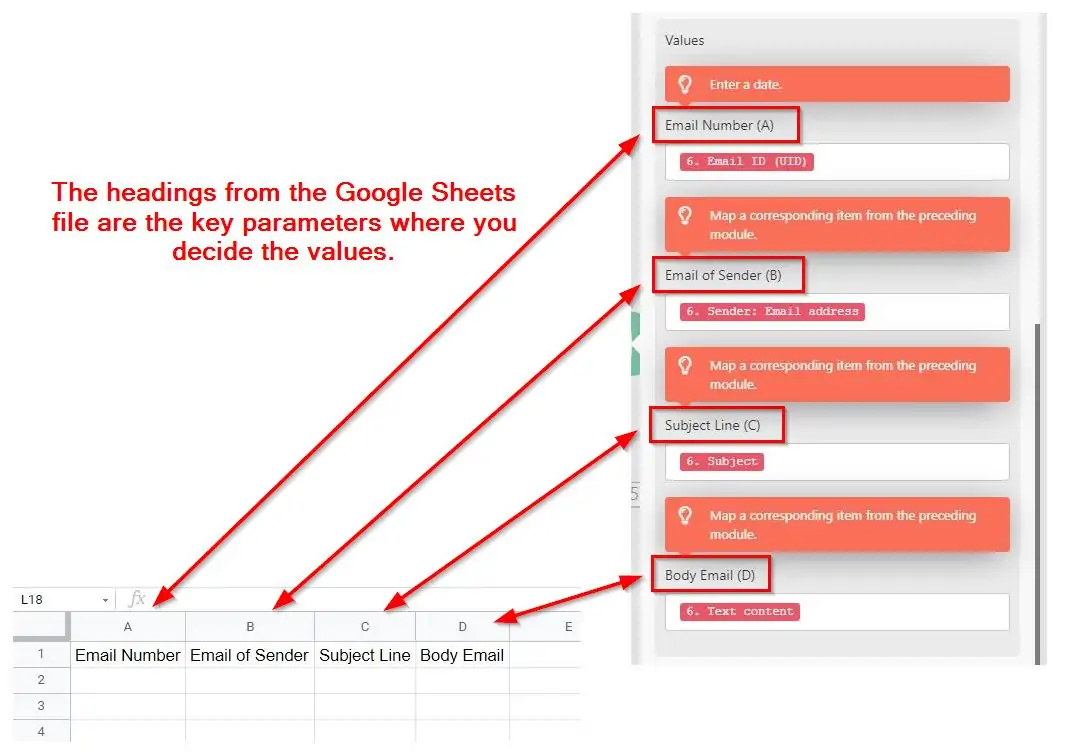
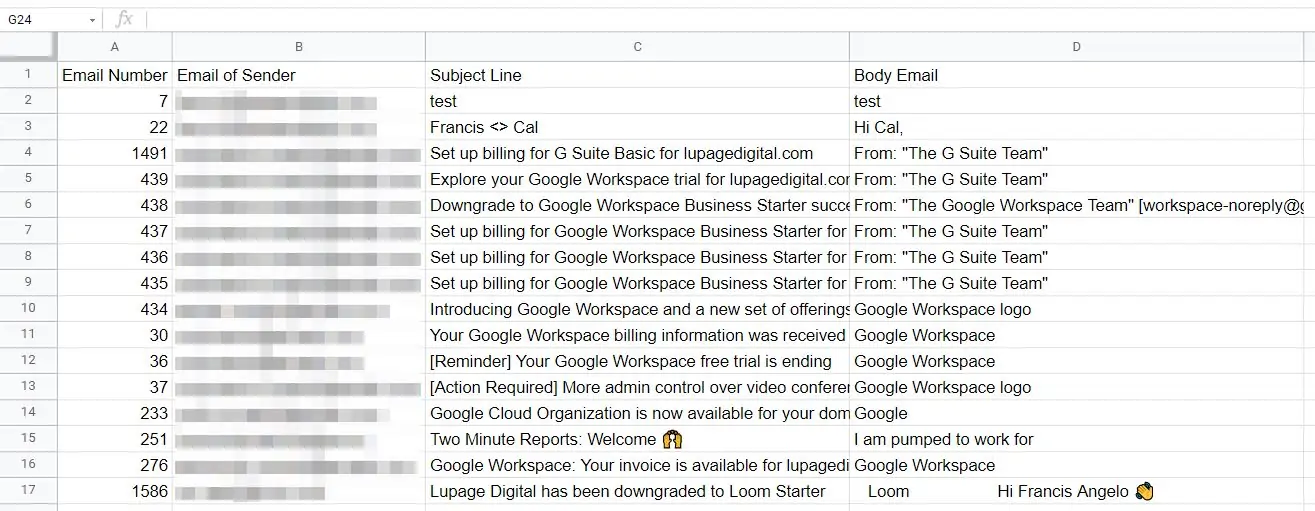
5 – Name the headers. It’s helpful to map out the correct data point in the integration process.
Column A: Email Number
Column B: Email of Sender
Column C: Subject Line
Column D: Body Email
The first steps are done! Go back to Integromat.
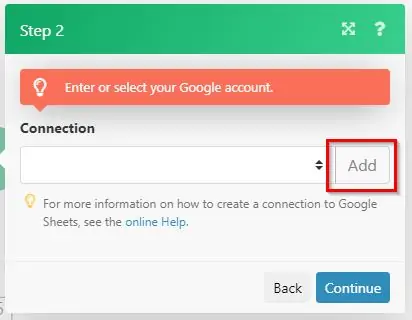
1 – Under Connection, click on Add.
2 – Name the connection. The name is arbitrary so it’s up to you. But I suggest writing a descriptive name for later use.
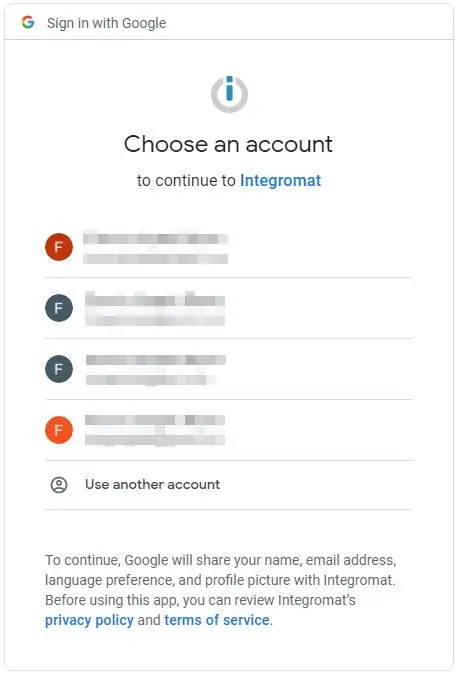
3 – Click on Continue. A pop-up window appears.
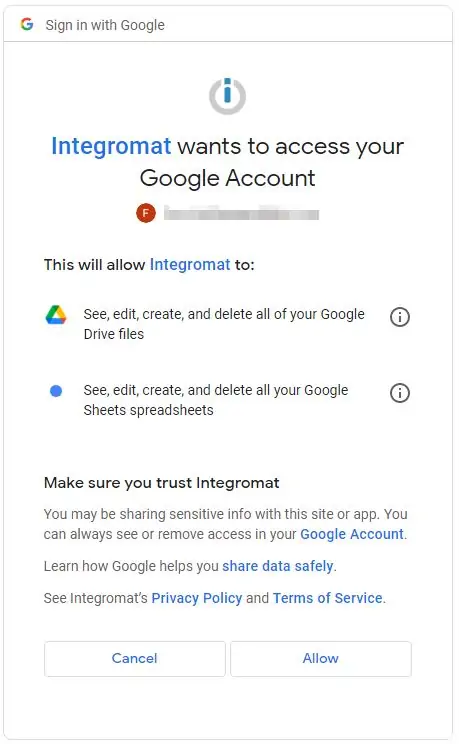
5 – Click Allow. Integromat asks permission to access your Google account. This is standard procedure. The window closes after clicking it.
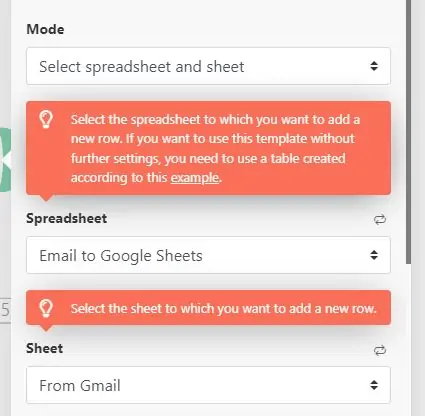
6 – Back in Integromat, under Mode, choose Select spreadsheet and sheet. This is to make the integration simpler.
7 – Under Spreadsheet, choose the Google Sheets file you created earlier. Find the name you gave it.
8 – Under Sheet, choose the Google Sheets tab from earlier. Find the name you gave it. After which, the ‘Values’ are created.
9 – Under Values is where it gets tricky. The headings from the Google Sheets file are the parameters where you decide the values. Once you click the field, you’re presented with different parameters. Don’t be overwhelmed. Read the context of the parameters to know which one is mapped to which.
Under (A), which is Email Number, select Email ID (UID).
Under (B), which is Email of Sender, select email address of Sender.
Under (C), which is Subject Line, select Subject.
Under (D), which is Body Email, select Text content.
Parameters like Attachment or Date are also available. Make sure to add an extra column and name it on the Google Sheets spreadsheet so on and so forth.
10 – Click on Continue. Now it’s time to run and process the integration.
A spinning wheel and a Log on the bottom right appear. Wait for the integration to finish. How long the integration takes depends on the Maximum number of results you select. It’s finished when a) green checkmarks appear, and when b) The scenario run was completed appears in the Log.
Go to your Google Sheets file and you now see the emails successfully exported from Gmail.
Viola! Congratulations you exported emails from Gmail to Google Sheets with complete information! You may also add other parameters or fields if you need them.
Schedule Automation and Reports
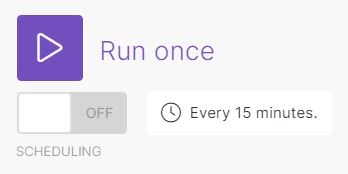
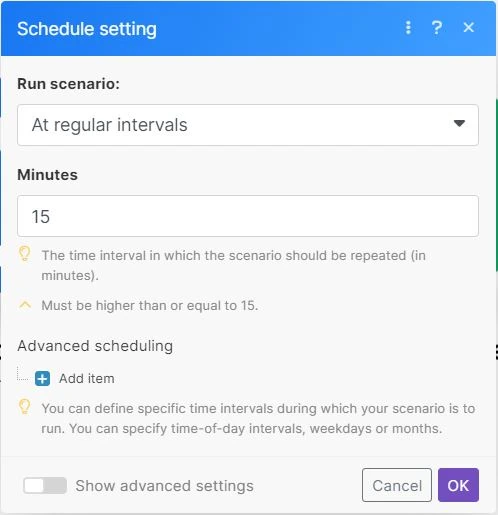
Make can schedule the automation based on cycles. The schedule is up to you.
2 – Under Run scenario, select the schedule you need. What you select on this parameter dictates the next ones.
If you select At regular intervals, you need to select the minutes that Make processes the automation.
If you select Once, you need to select the date.
If you select Every day, you need to select the time.
If you select Days of the week or Days of the week, you need to select the days.
3 – Click on Ok. Ignore any advanced settings for now.
Viola! Congratulations you’re automating Gmail exports to Google Sheets!
More articles on automation:
Import Facebook Page Insights to Google Sheets
Import LinkedIn Page post data to Google Sheets
Import LinkedIn Ads API data to Google Sheets
Import Search Console Data to Google Sheets
Import WooCommerce data to Google Sheets
Import Facebook Ads data to Google Sheets
Import Google Ads data to Google Sheets
Import Mailchimp data To Google Sheets
Import Shopify data to Google Sheets
Import TikTok ads to Google Sheets
Import GA4 data to Google Sheets
Import ChatGPT to Google Sheets
Import JSON to Google Sheets
Export Gmail to Google Sheets
Conclusion: Send Gmail to Google Sheets Faster
Running a business is a never-ending cycle of work. This no-code solution doesn’t need you to learn coding or Python. It’s frustrating to juggle all of your responsibilities. Invest in tool automation and avoid repetitive tasks. Integrate apps you use every day. Time is precious for you so get back to doing what matters most: growing your business.

