Content marketers often ask if the blog posts on websites are providing positive ROI. Another case is when the SEO team needs to check the internal links between pages to assess the internal link structure for SEO ranking. The purpose might be to decrease the page load or improve user experience.
Whatever the case may be, the question focuses on how to track internal links on websites.
There’s a way to do it correctly.
Note:
You should know a little bit of HTML and CSS to know your way around. Knowing Google Tag Manager and a little bit of JavaScript can help as well. You should learn how to use Google Tag Manager first before diving into implementation.
How NOT to Track Internal Links: UTM Parameters
Other blogs have said time and time again that UTM parameters (utm_source=, etc.) are not ideal. Generating UTMs and adding them to internal links bloats the referral traffic. It floods the referral channel under the Acquisition reports. This often happens on blog posts.
It also goes against Google Analytics’ best practice to always include the website in the referral exclusion list. This self-referral exclusion will prevent any traffic from inside the domain to pass unwanted session count to itself and instead get data only from outside traffic.
In addition, Google themselves said that putting UTM codes can give mixed signals to SEO web crawlers.
Use Google Tag Manager to Track Internal Links Properly
Internal links are what links a page from a domain going to another page on the same domain. Google Tag Manager is a web analytics tracking powerhouse so it’s the most logical choice to track these internal links. I’ll focus on one type.
Track Internal Link Clicks from an Anchor Tag
This is an example of an anchor text going to the homepage. This is just one of the many internal links to track.
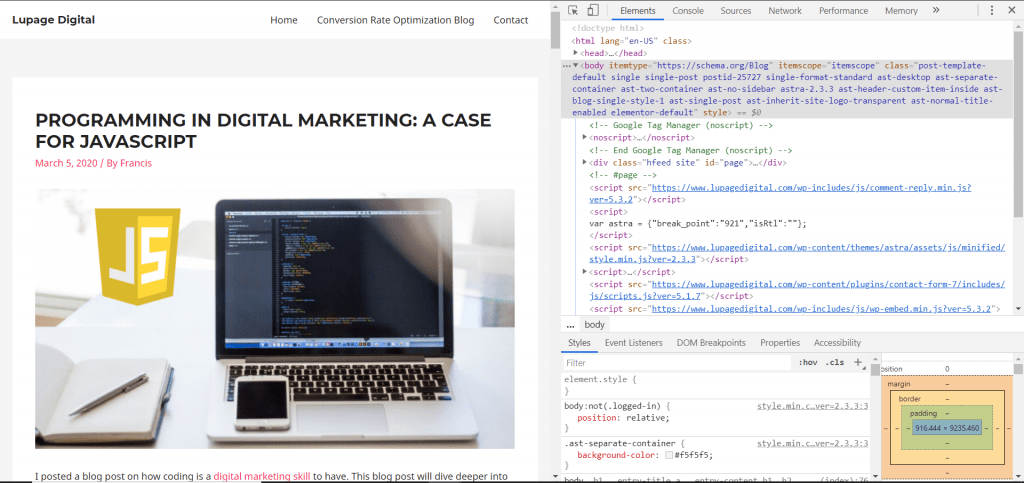
- Go to a blog post
- Press right-click
- Click Inspect
You can see the entire HTML element of a page here. You need to hover your mouse inside and look for the HTML element that houses your links.
The body’s HTML element or CSS selector in this example is:
<div class ="post..."></div>Note:
The HTML element or CSS selector will be different on your website. Heck, it might not even be there. Traverse the HTML document and spot what your HTML element/CSS selector is. Ask help from a web developer.
This HTML element/CSS selector is what houses the content. This information can be added in Google Tag Manager.
Go to Google Tag Manager
Your Google Tag Manager should be set up already. Setting it from the ground up is beyond this blog post so I suggest looking into other resources. You should also already know how to navigate GTM.
Variables
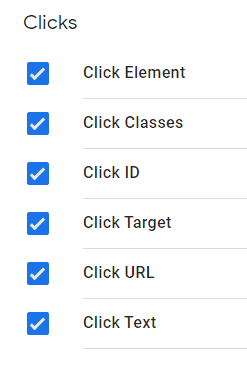
The first thing to do is to enable 3 built-in Data Layer Variables. This returns the information of the click that will be tracked.
Click Element: This will return the HTML element of what will be clicked.
Click URL: This will return the URL where the click will land on.
Click Text: This will return the text on what will be clicked.
You may enable all Data Layer Variables since it’s normal to have them all enabled anyway. These three Variables will be enough.
Triggers
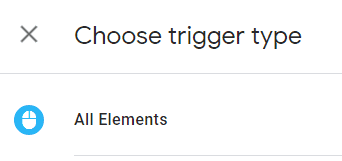
Next is to select the Click Trigger. The Trigger will be an All Elements trigger type.
Things will be tricky after…
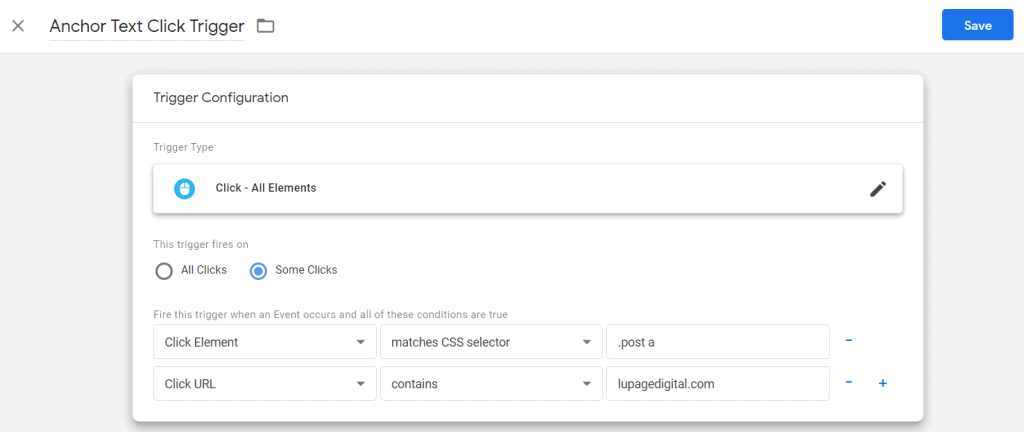
You’ll enter the HTML element/CSS selector that you acquired from the web page here. Follow the screenshot below and click Save.
Name:
Anchor Text Click: The name could be anything.
This trigger fires on:
Some Clicks
Fire this trigger when an Event occurs and all of these conditions are true:
Click Element:
The built-in Click Variable from before.
matches CSS selector:
Will catch the HTML element/CSS selector.
.post a
The HTML element/CSS selector from the web page. Again, yours will be different.
Enter {{Click URL}} to catch anything that contains your domain name. This way, the Tag will Trigger only when the click is going to a web page in the same domain. When you enter the HTML element/CSS selector (in this case, it’s .post), you need to put a space then put letter a. This is saying, “Get all <a> tags on the body content.”
At this point, you’ve possibly caught all the anchor tags for all blog posts.
How? All internal links have the <a> tag going to different web pages. This references the <a> tags on the blog post inside the body document, which is .post. Most likely that all your blog posts have the same HTML structure.
Make a Google Tag Event
Now it’s time to make a Google Tag Manager Event to send data from Google Tag Manager to Google Analytics.
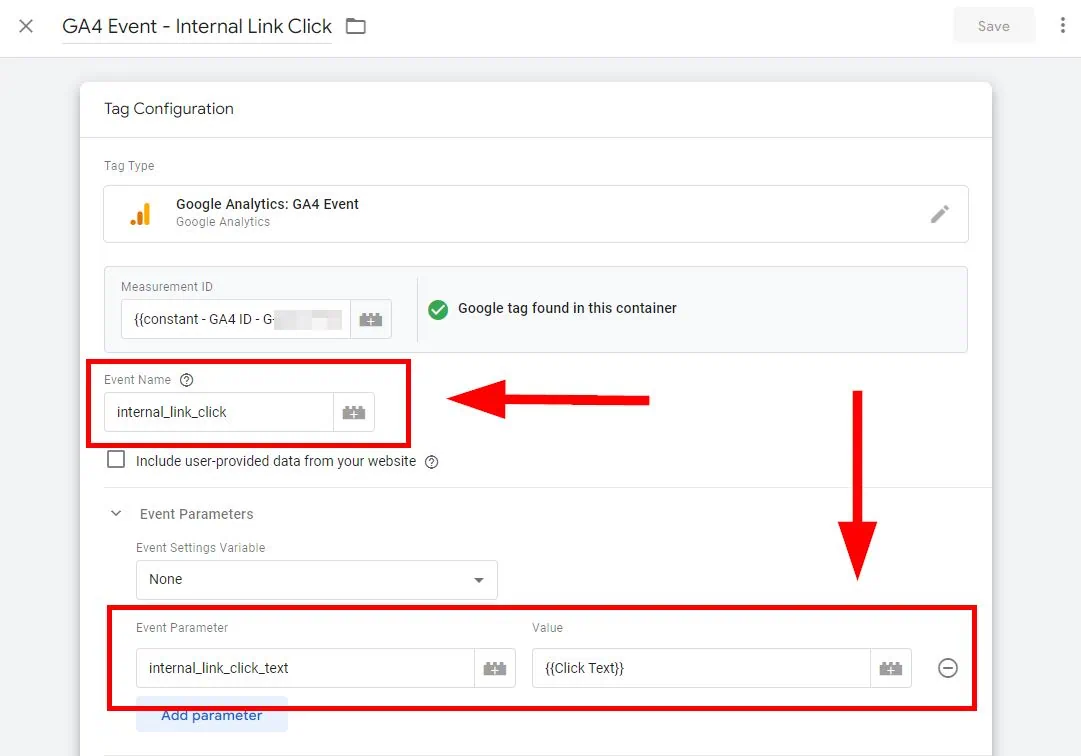
Create the Tag the same as the screenshot below and click Save.
Name:
GA4 Event – Internal Link Click
Event Name:internal_link_click
Event names are case sensitive so it’s recommended to use lower case as well as using underscores rather than spaces.
Configuration Parameter: internal_link_click_text
Label:{{Click Text}}
The {{Click Text}} will be the text of the anchor tag users click on.
Debug and See if the Tag is Working
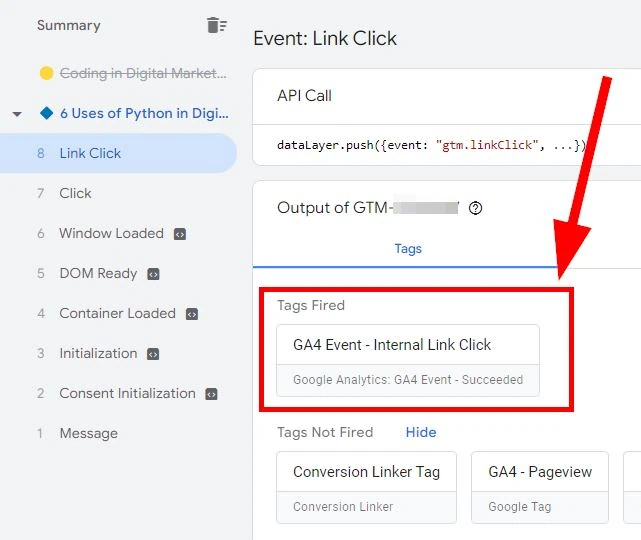
Google Tag Manager has a way to debug if the Tags, Triggers, and Variables are working. Go through your website and do a test by clicking an anchor tag. The tag should work if the tag is under Tags Fired.
It’s possible that the Tag won’t fire. You can customize your targeting and debug further. Try to target different HTML elements to get what you need to catch the correct anchor tags. You can also add {{Page URL}} to trigger the tag on specific pages only. It’s up to you how to trigger with more precision.
Publish the Google Tag Manager container and you’re done! Whew! 💪
Track Internal Links as Custom Dimensions in Google Analytics
Send the internal link Tag as a Custom Dimension in Google Analytics. The Event tag in Google Tag Manager will display the anchor tag as a Dimension and put them beside the standard Google Analytics metrics (Event count, etc).
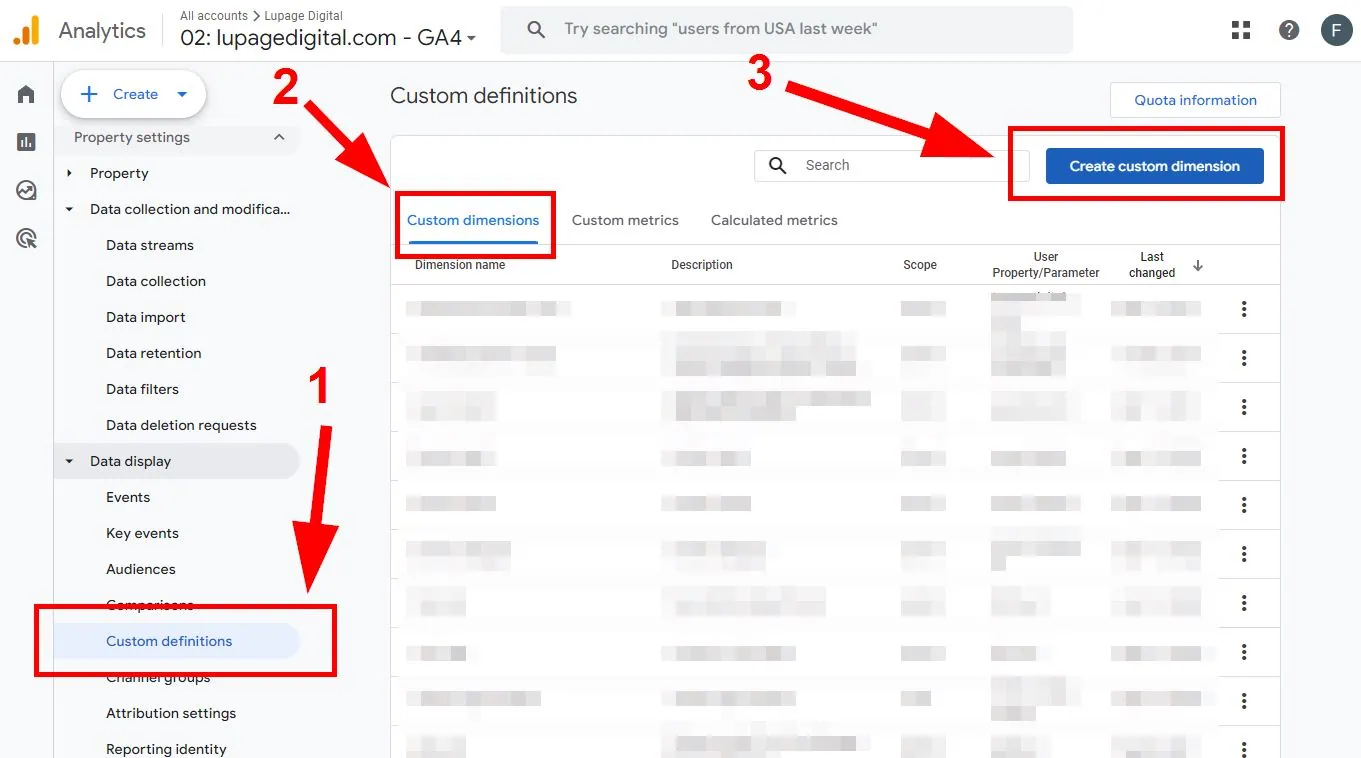
Go to your Google Analytics admin and find Data display. Then click on 1) Custom definitions > 2) Custom dimensions > 3) Create custom dimension.
Inside, add the following information. Then click Save.
Dimension name:
You may enter any name.
Scope:
Event
Description:
You may enter any description.
Event parameter:internal_link_click
This should be the same Configuration Parameter you entered earlier.
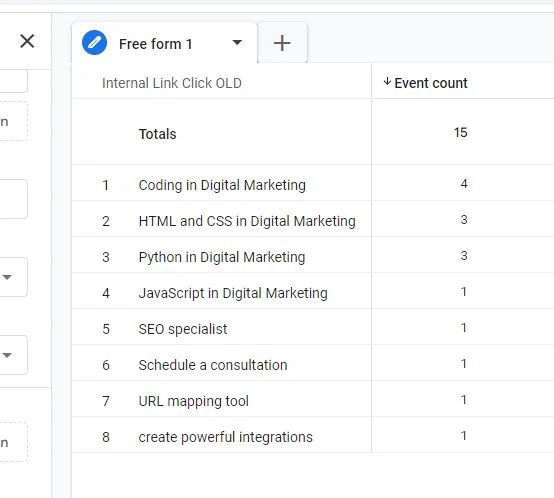
The anchor text will be a Dimension in Google Analytics. You’ll see it together with the standard Google Analytics metrics. Congratulations! 🎉
Important note:
Google does not allow users to store personally identifiable information in Google Analytics.
Conclusion: Track Internal Links Today
Ask a web developer and show them these methods. Ask a google analytics consultant if you don’t have web developers to ask for help. If still none, well, good luck! You won’t move forward without the technical know-how. 🙂
If you want to do everything yourself and won’t spend on outsourcing this task, then you have no choice but to learn HTML/CSS and Google Tag Manager to grasp this. Google Tag Manager and Google Analytics are powerful tools to track user interactions. Tracking internal links is just a glimpse of what it can do. It becomes more powerful when combined with proper goals, KPIs, and analysis.

